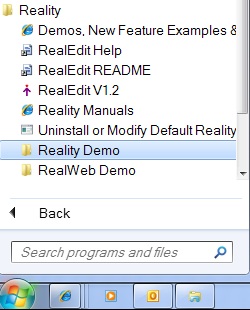
This menu option provides access to the automatically installed complete set of Reality Manuals and the typical Pick/MV TCL command prompt within the delivered demo database (demodb), which can also be accessed from remote systems via a Telnet session providing this protocol has been enabled under Windows features in Control Panel.
◄ refer to Reality sub-menu information
Loading Optional Features… The following can be loaded at any time, SQL ODBC/JDBC and other connectivity options, Web Client S/W, Screen Editor (RealEdit) and more – e.g. TCP/IP Bridge permanent connections and serial port access, Active-X, TCP/IP Sockets examples… Refer to Installation page, [Custom] option under Windows Install.
This provides a Documentation set that covers all features in high-level overview sections and for every command. All commands have examples of use so that you can quickly understand why and how they are used.
Please check you have the latest updates, available on the Documentation page.
TCL to Reality database ‘demodb’, gives you access to Reality’s SYSMAN Account at the TCL command prompt within a Windows Command Prompt. For folk that go back to old teletype days the output of the CHOO-CHOO may be be familiar. This illustrates that all of the old TCL commands remain, along with many new one for when a simple text screen is still an efficient interface. For full details of each command refer to TCL in the index in the documentation.
Simple Transaction Handing/Boundary example using TCL… Reality has Transaction Handling built in for all databases that provides for a defined set of updates to the database as a Transaction Boundary. The transaction can then either be fully committed or aborted for all updates in the defined Transaction Boundary.
The following TCL command dialogue is an example of using the TRANSTART command to start a transaction boundary, whereby all Item updates are locked with an Item lock until either a TRANSABORT command is used to rollback all Item updates for the open transaction or a TRANSEND is used to commit all Item updates and the transaction is ended. There is a “command by command” description following the screen display below.
As you can see, following the TRANSTART the TCL EDitor is used to create a new Item in the accounts MD using ED MD TEST_ITEM, hence ED responds with “New item” indicating the top of a new Item and then the FI command is used to file and exit from the edit session.
The TRANSQUERY command then shows that there is a transaction active, with LIST-ITEM-LOCKS showing that there is one Item Lock asserted for port 401 where these commands are being executed.
The second use of the editor command, ED MD TEST_ITEM, then shows that the Item-ID TEST_ITEM still exists as the EDitor responds with just “Top” and not “New Item”.
The TRANSABORT command is then used to abort the open transaction, hence the following LIST-ITEM-LOCKS indicates the existing lock for port 401 is no longer exerted. When another ED MD TEST_ITEM is executed the EDitor responds with “New item” as the TRANSABORT effectively deleted the Item. To end the Transaction and retain updates the TRANSEND command is used instead of the TRANSABORT used in this example.
Notes on using typical Transaction Handling
The above commands can be used at TCL for use in Proc, TCL command scripting, while similar commands are available for use within the DataBasic language. As for all typical use of Reality Transaction Handling to open a Transaction Boundary the application should carefully control the time a transaction boundary is open as all database Items that are updated will be Item locked from other users until the transaction is either filed with the TRANSEND command to commit the transaction or aborted with the TRANSABORT command.
Open transactions should therefore be an atomic set of updates not relying on human input or clashes with other prolonged Item locks held within the application. For typical commercial use the TRANSTART and then database Item updates would be after a human user has decided to complete a transaction, like buying items in a basket. The opened transaction would then be used to update all database Items connected with the sale. This would either go through to completion, as the total transaction was successful and a TRANSEND used to commit all database updates. If, however, the credit card used was declined or any part of the atomic transaction boundary failed, a TRANSABORT would be used to rollback all updates.
For information on Transaction Logging, where all database updates are recorded in logs and can be used to update a complete database copy on another System refer to [Resilience] on the Product Feature Information page.
SQL access is built into every Reality database. Once at TCL, just use LOGTO DEMO and then type SQL.DEMO and you can go through a tutorial covering selects, output specification, clauses, set functions, joins, updates and handling Reality multi-values and sub-values.
For detailed information refer to the documentation under SQL for Reality in the Contents tab.
Telnet to Reality database ‘demodb’ provides remote/local telnet access into the default database ‘demodb’. This protocol may need to be enabled under Windows features in Control Panel. Providing the default TCP/IP port (23) is currently free you will see a Logon please : message when you telnet to the System’s IP address/name, or using “localhost” on the same System. Note: you can change the TCP/IP port used by Reality using the netadmin command at a Windows Command Prompt. This can also be used to change the default database from ‘demodb’ if you have created your own database with the mkdbase command.
Security Note! In order to secure your system users will only be able to telnet login using the DEMO user profile. In order to login as SYSMAN, with all security privileges, refer to Start> All Programs> Reality> Demos, New Feature Examples & Downloads. On this page you will find details of How To Telnet Into The SYSMAN Account and retain a secure demo system. Note: This is also covered as an FAQ, refer to: How to telnet into the Demo Database as SYSMAN
RealEdit – is a configurable Windows screen editor for updating programs and data in any item within a database. It can access DataBasic programs, Procs, data file items, and file dictionary items.
It is similar in operation to other Windows editors, however, it also allows you to perform Reality specific operations such as compiling and cataloging DataBasic programs and viewing included code.
Note: This feature has to be installed from the installation delivery, refer to the Utilities menu, as detailed in the Other Options & Information tab above ▲ Please check the Latest Updates page under the [Components] tab.
The Reality demo provides for a maximum of 3 concurrent user logon and process sessions, as used for user process access and data interfaces into a database. You will then see errors, e.g. Logging into Reality – <49017>: Too many connections. RealWeb Demo – Login failed. Please try again… or RBASIC error: connect failure. Other – connection refused, or similar.
Databases will disconnect all users after 4 hours with connected users, with error – reality: Logged off by SIGTERM signal (15) and Reality needs to be restarted using the interrupted use reset For Windows. Run realserv -e, then a realserv -s from a Windows command prompt. For UNIX: Run realstart from a root console prompt.
You will then get another 4 hours of connected use.
Significant System Resilience Features require a full licence.
To remove the restrictions or extend the 3 connected users please contact us for temporary licenses.
This menu option provides access to some HTML pages that call DataBasic RealWeb routines to provide example source code and an application demonstration to experiment with.
Refer to RealWeb under External Interfaces in the Contents tab of the Documentation, where all Web API commands have coding examples of use so that you can quickly understand why and how they are used. The example on the right shows the code for the RW_ START_ HTML_PAGE API CALL and as with each CALL you then get to see the results of the code. Without formal HMTL training you will soon be creating you own web pages directly from DataBasic.
◄ refer to sub-menu information
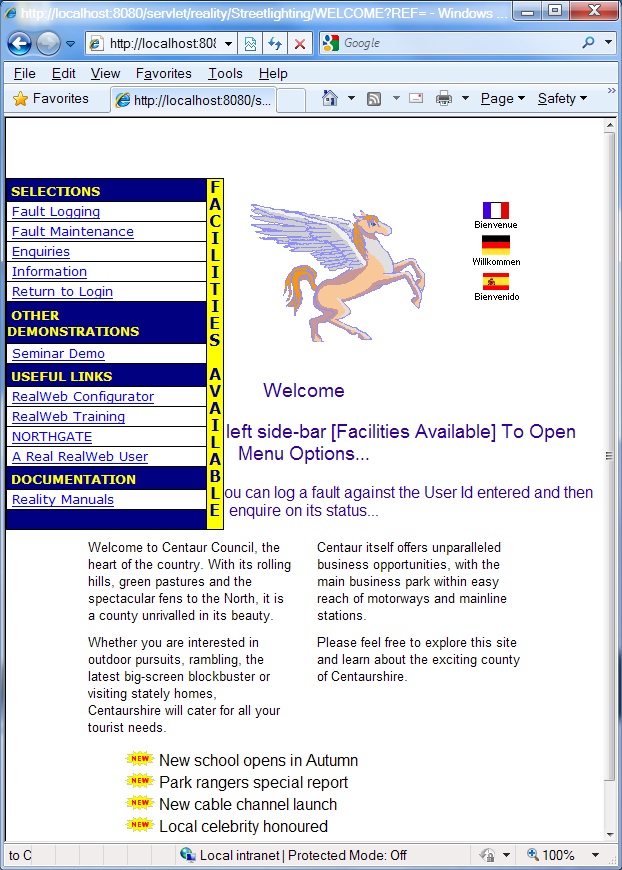
This uses standard RealWeb, java script and other data stored within the Reality Database in order to integrate within an existing website.
All sound, images and java script is stored as standard Items in the Reality Database.
Refer to the Account ROBC in the demodb database, where you will find all files and source code.
RealWeb Programming Examples To Experiment With, provides example RealWeb programs and an Editor/Compiler (written in RealWeb) so that you can take your first steps with using standard DataBasic to create a Web user Interface…
Refer to the link Quick Start For Using RealWeb when you run this Demo option, which runs a RealWeb program. All source code for the RealWeb routines can be found in the DEMO and ROBC Accounts.
Refer to the Documentation, under RealWeb in the External Interfaces section, where you will find examples of code for all of the many RealWeb Subroutine calls. Start with simple HTML and end up with tables, cascading style sheets and more…
These options start and stop the delivered self-contained Tomcat Web Server that’s required by the RealWeb Demo. After the initial demo load you should see a minimised Tomcat window. This will need to be started each time the System is rebooted or you have logged off and back on from Windows.
English Tutorial is a RealWeb demonstration, covering elements of the original Reality ENGLISH-TUTORIAL Account using RealWeb. For further details refer to the Beginner’s Guide to English under Other Documents in the Contents list of the Documentation.
The following options are also available under the installed Reality Demo:
More Features & Information Available From the Installation Delivery Image …
Run the setup.exe in the Reality installation delivery and click on the [Custom] button, refer to the following sub-menus.
Web Services:
Refer to the additional CD/ISO installation delivery available from the Latest Updates page. See how easy it is to make your Reality code available to the wider world…
Uninstall or Modify Default Reality
This is used to select the default version of Reality to use on a System and allows for the deletion of old versions. When the last version remains using the Delete button will remove Reality. It can also be used to install a keyfile containing a System serial number key and/or feature keys. This command can also be run from the Windows Control Panel, Programs and Features, under Reality or from the ISO delivery at Drive:\Reality\Base\setup.exe

 This menu option provides access to the automatically installed complete set of Reality Manuals and the typical Pick/MV TCL command prompt within the delivered demo database (demodb), which can also be accessed from remote systems via a Telnet session providing this protocol has been enabled under Windows features in Control Panel.
 TCL to Reality database ‘demodb’, gives you access to Reality’s SYSMAN Account at the TCL command prompt within a Windows Command Prompt. For folk that go back to old teletype days the output of the CHOO-CHOO may be be familiar. This illustrates that all of the old TCL commands remain, along with many new one for when a simple text screen is still an efficient interface. For full details of each command refer to TCL in the index in the documentation.
 selects, output specification, clauses, set functions, joins, updates and handling Reality multi-values and sub-values.
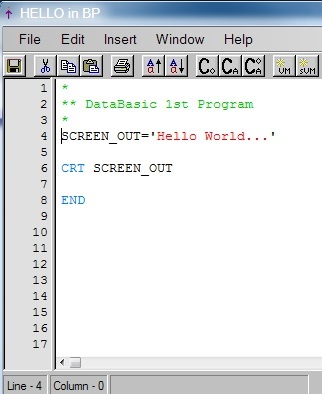 RealEdit – is a configurable Windows screen editor for updating programs and data in any item within a database. It can access DataBasic programs, Procs, data file items, and file dictionary items.
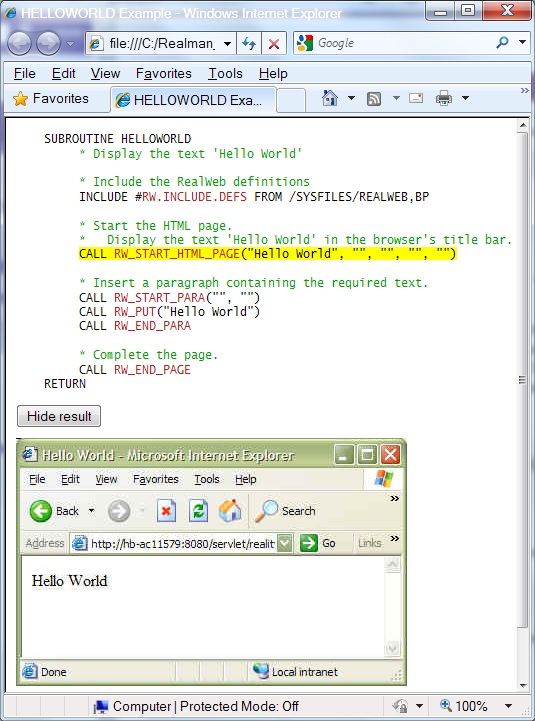

 RealWeb Programming Examples To Experiment With, provides example RealWeb programs and an Editor/Compiler (written in RealWeb) so that you can take your first steps with using standard DataBasic to create a Web user Interface…
 This is used to select the default version of Reality to use on a System and allows for the deletion of old versions. When the last version remains using the Delete button will remove Reality. It can also be used to install a keyfile containing a System serial number key and/or feature keys. This command can also be run from the Windows Control Panel, Programs and Features, under Reality or from the ISO delivery at Drive:\Reality\Base\setup.exe